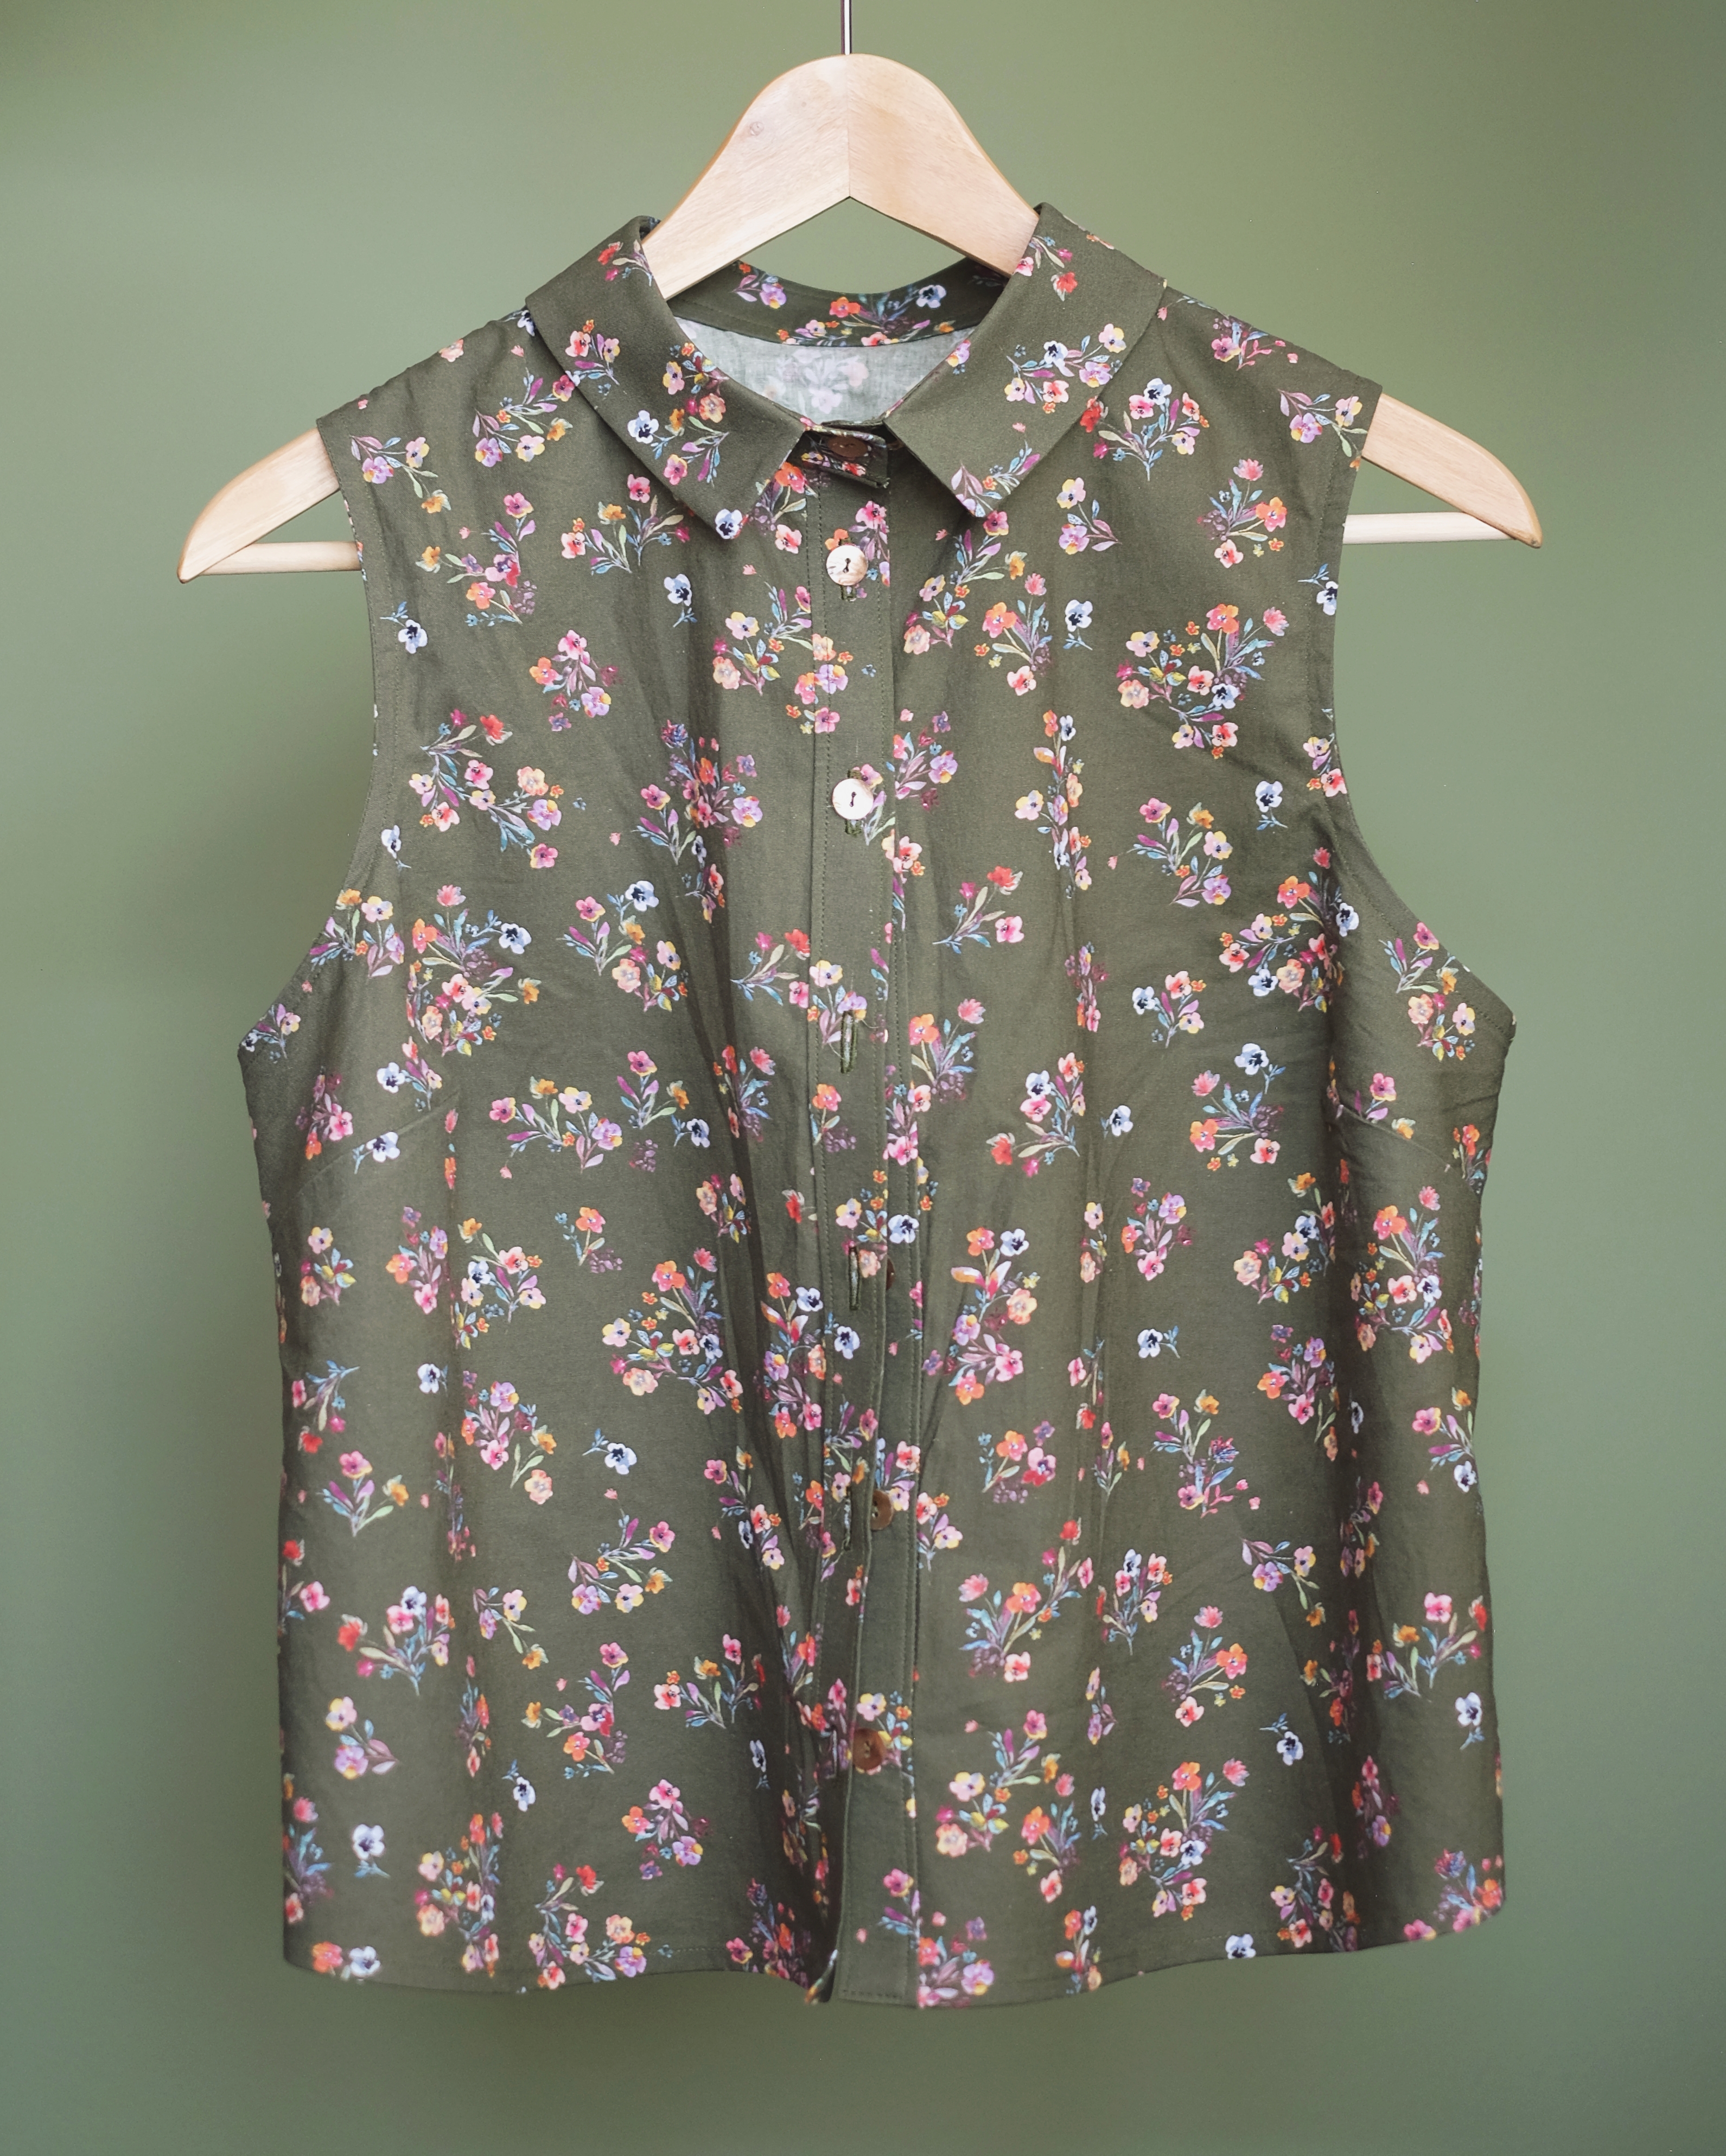
Last week I had the chance to do a bit of sewing, and made my very first collared shirt! It was a project I’ve been planning for a little while, chosen pretty deliberately as a skill-building project. The pattern is the Willis Shirt from Seamwork, and I chose it because aside from the collar, the other techniques (the button placket and bias facings) were ones I’ve successfully executed and feel relatively comfortable with. All in all, I’m really proud of how it came together, even if there are some things I would do differently next time, and I learned a lot making it.
Firstly, if I make this shirt again I’ll make a smaller size. It’s not so huge on me that it looks too too big, but it’s definitely too big. I wouldn’t choose this size in a store. The idea for this shirt was for it to be somewhat of a wearable muslin – I got the fabric in a remnant sale at a local fabric store – so I decided to cut a straight size 8 with no modifications and see how it turned out. My measurements are nearly identical to the body measurements listed for the size 8, and looking at the finished garment measurements I saw that there would be 5 5/8″ (14 cm) of positive ease at the bust and I felt like that might give the “relaxed fit” the pattern says it has. But I should have checked the waist and sweep measurements, because I didn’t realize how A-line it would be. There’s 14 1/2″ (36.5 cm) positive ease at the waist, which is quite a lot, especially for someone who likes to wear collared shirts tucked into a skirt.
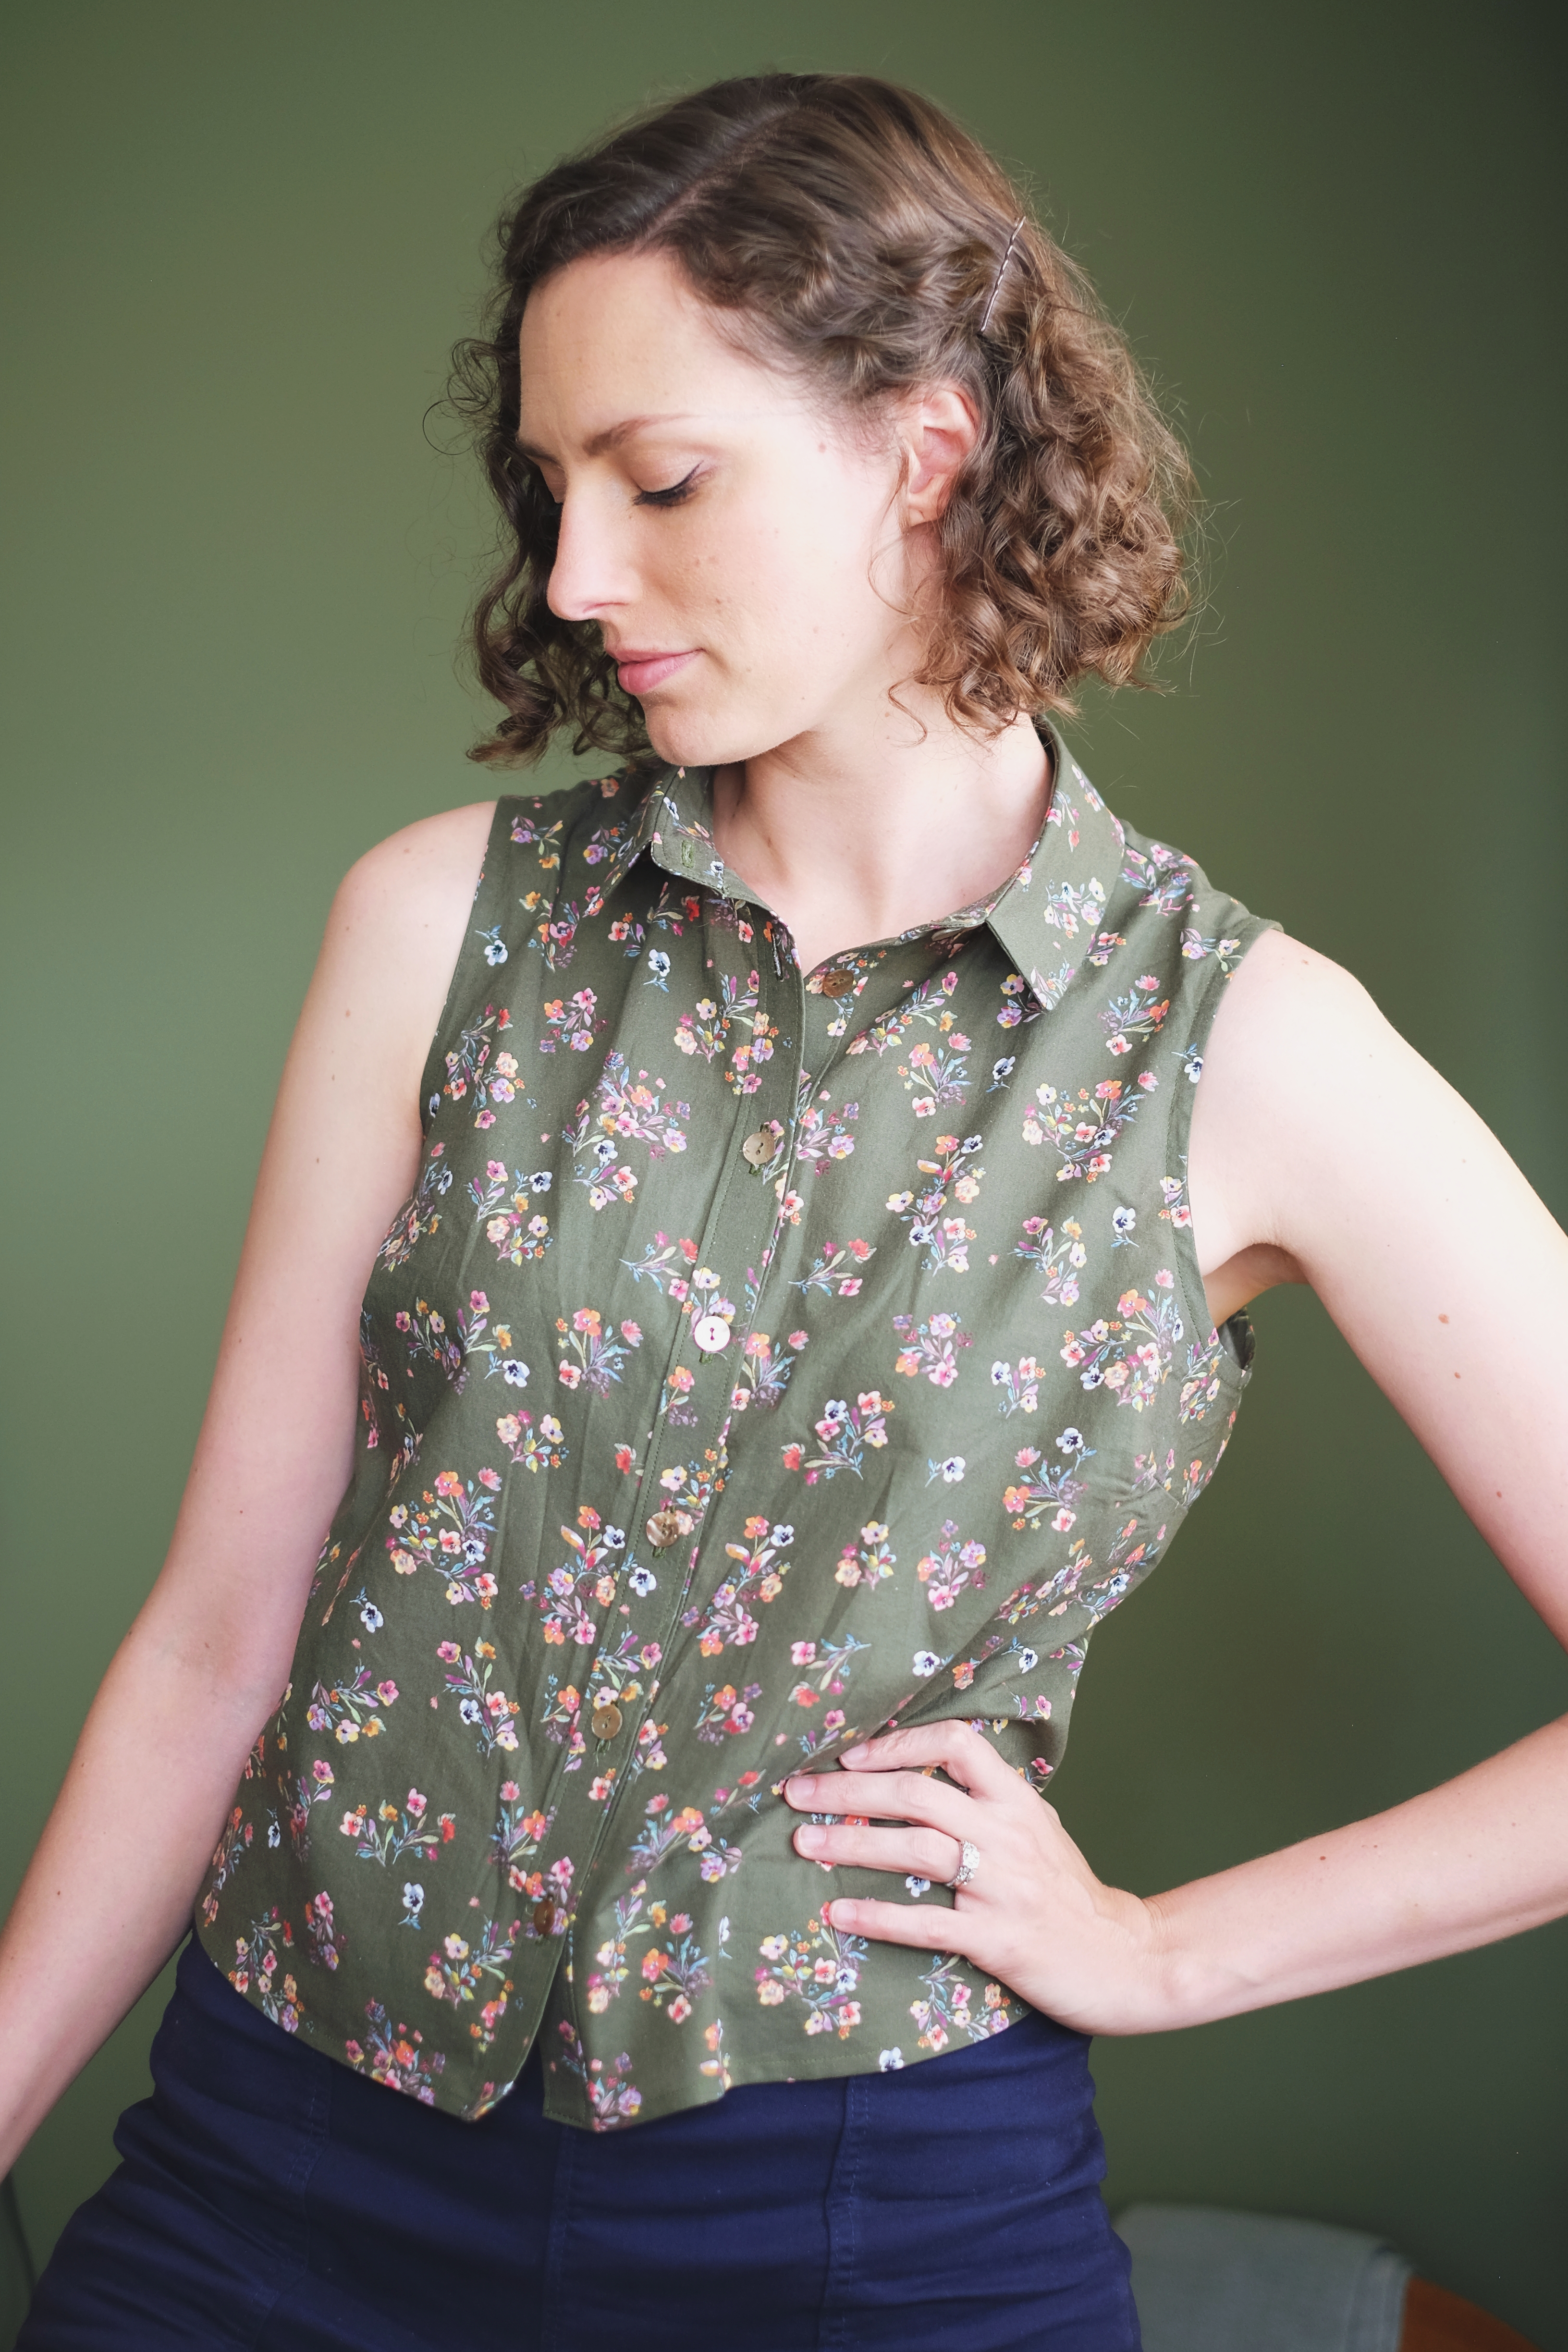
I posted photos of the shirt on Instagram and a lot of people said very complimentary things (which I’m grateful for!), including about the fit, but I kind of feel like the first rule of the internet is that photographs are often excellent liars. The hand on hip in the above photo is doing a lot of work. The photos below do a much better job of showing exactly how roomy this thing is.

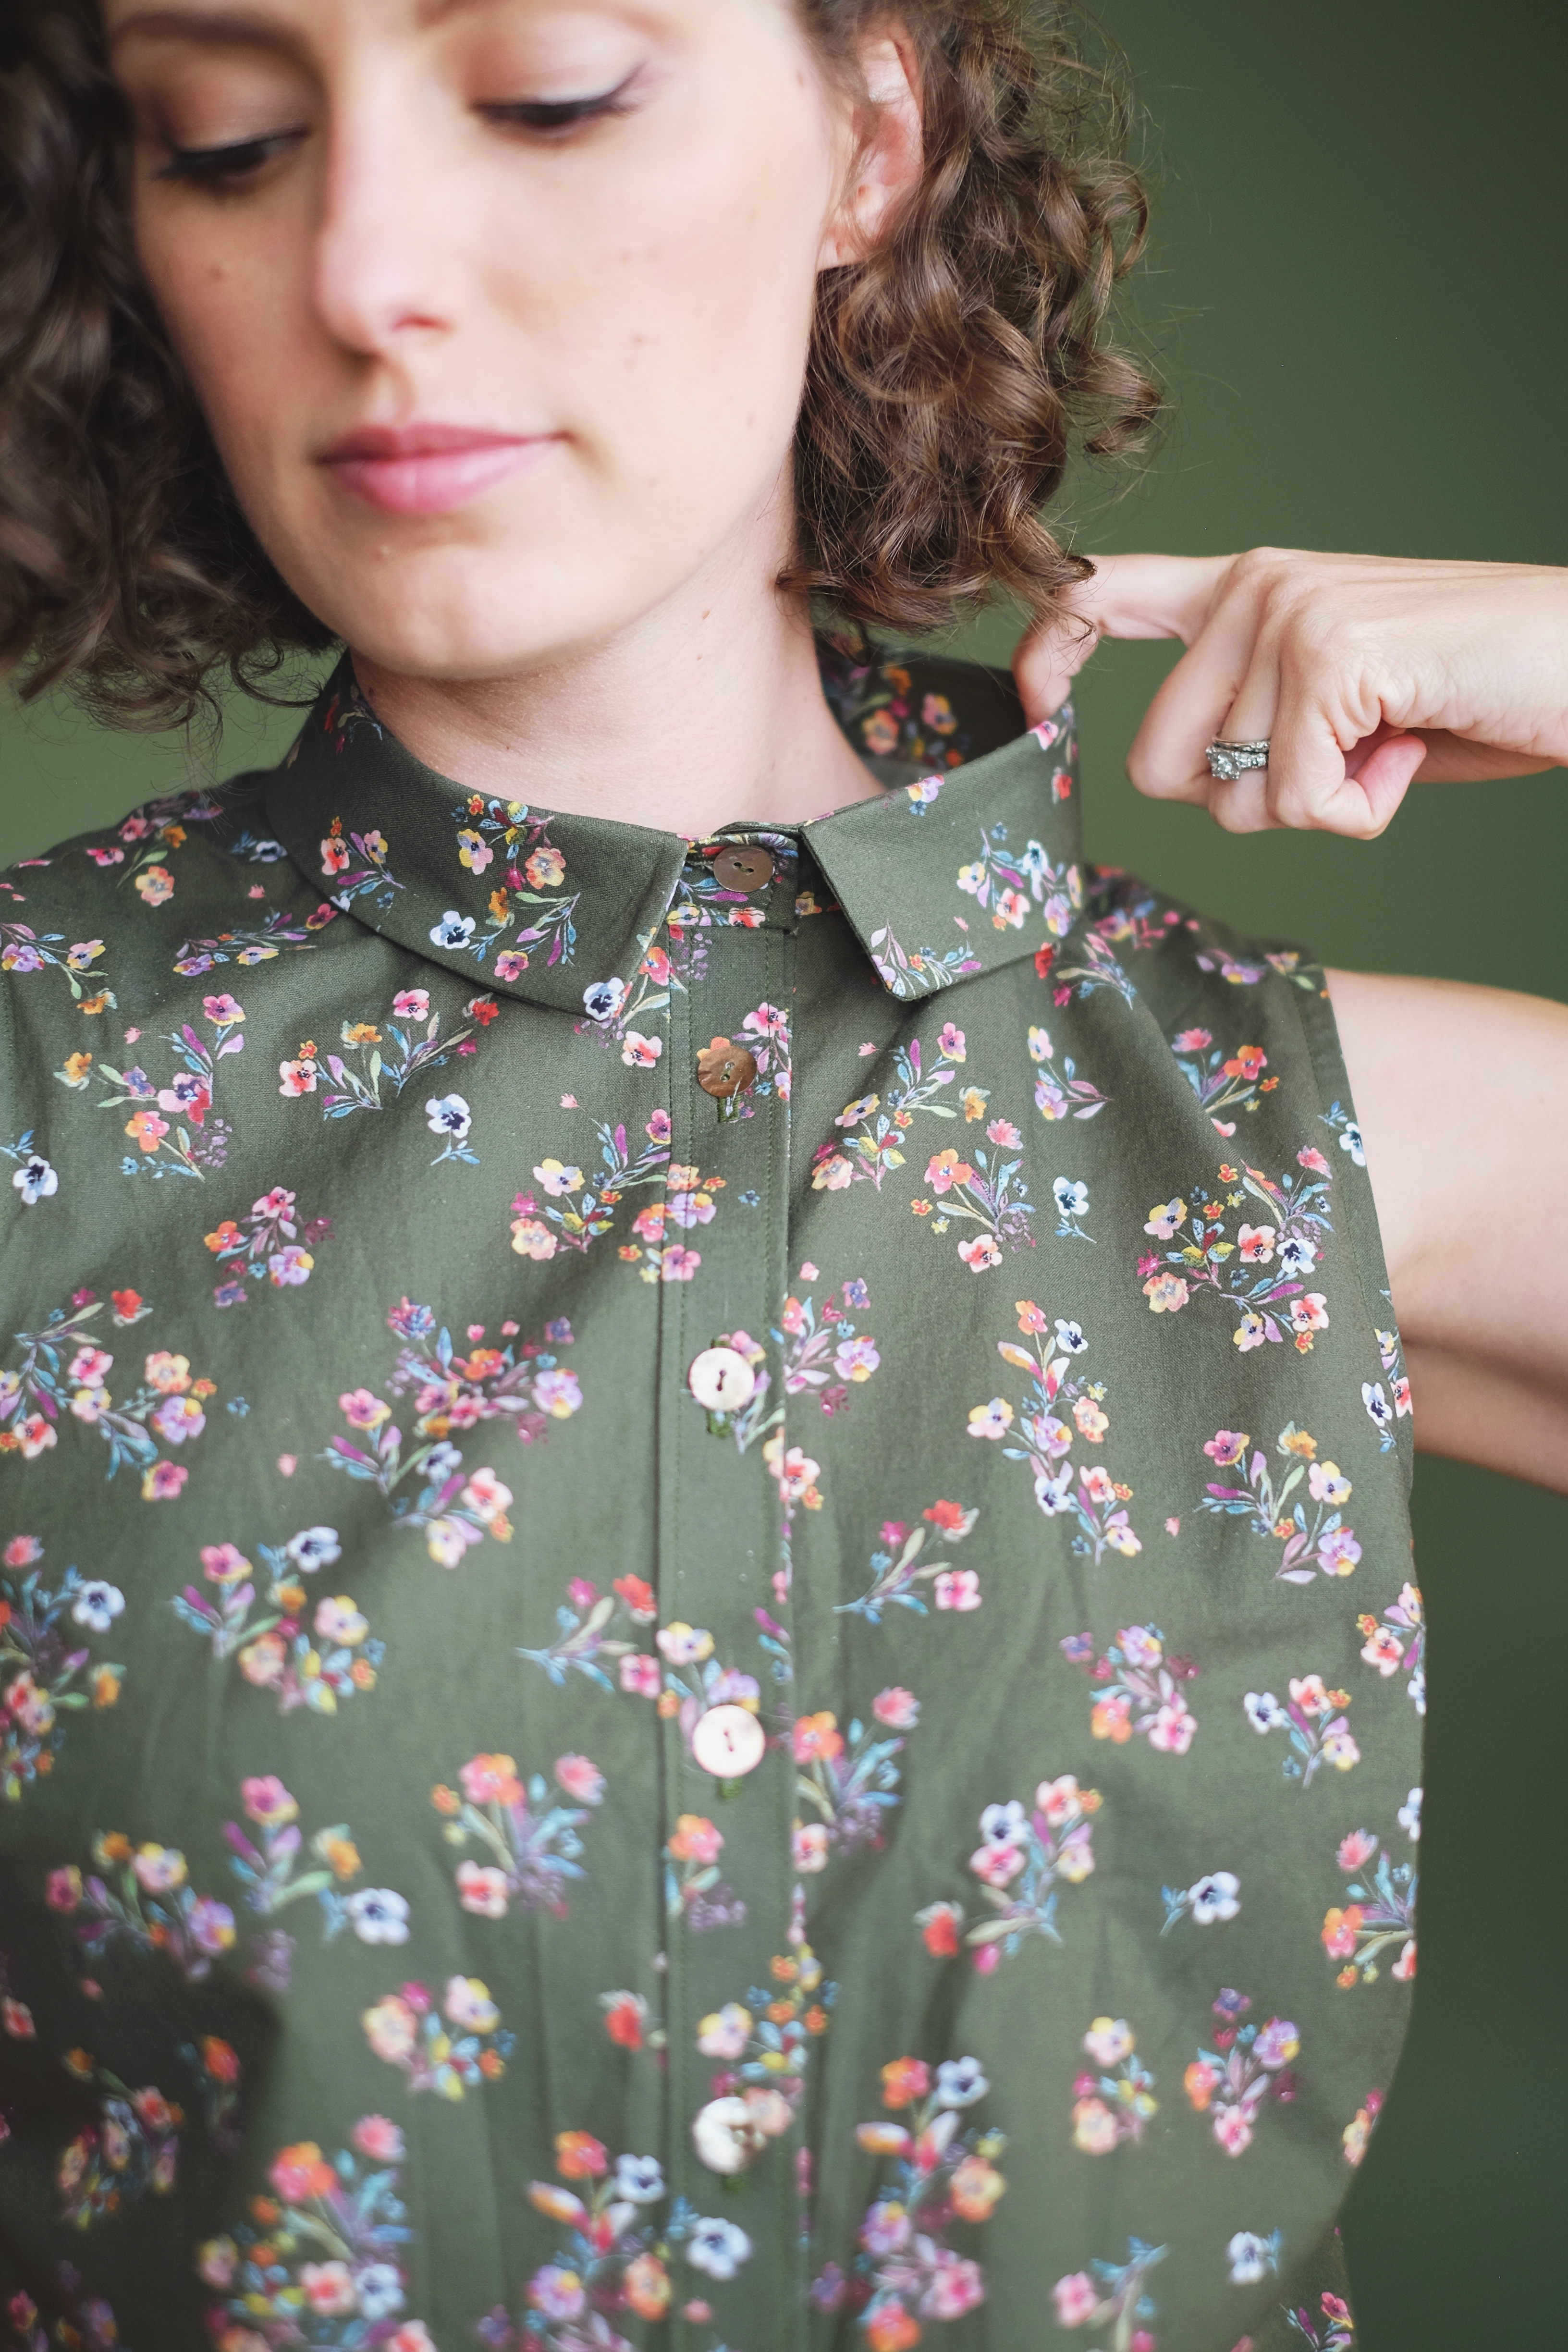
As you can see, the collar’s also kind of huge. Part of that probably comes down to my own novice skills – it’s the first time I’ve constructed a collar and it sits a little strangely. But even if I pull the two top corners together so they meet (which I think they’re supposed to, looking at the sample photos), the collar’s still huge on me. I’ve got kind of a skinny neck, but I’ve never had a collared shirt do that before, so I don’t think it’s just me. I guess Seamwork and I have different ideas about what a “relaxed” fit is.
All that being said, it is wearable, and I do like it. The interfacing may bit a little heavy for this application, the collar might not quite sit right, but it’s also a project that really helped show me how far my technical sewing skills have come since I started sewing again last year, and that felt amazing. I’m very proud of all of my finishing on this shirt. I took my time with each step and it shows. French seams at the sides and shoulders, a neatly executed hem, straight topstitching on the button placket, relatively sharp corners on the collar… the list of the things I’m proud of is actually pretty extensive, and definitely outnumbers the flaws. There’s always room for improvement, but I can see how far I’ve come, and that feels great.

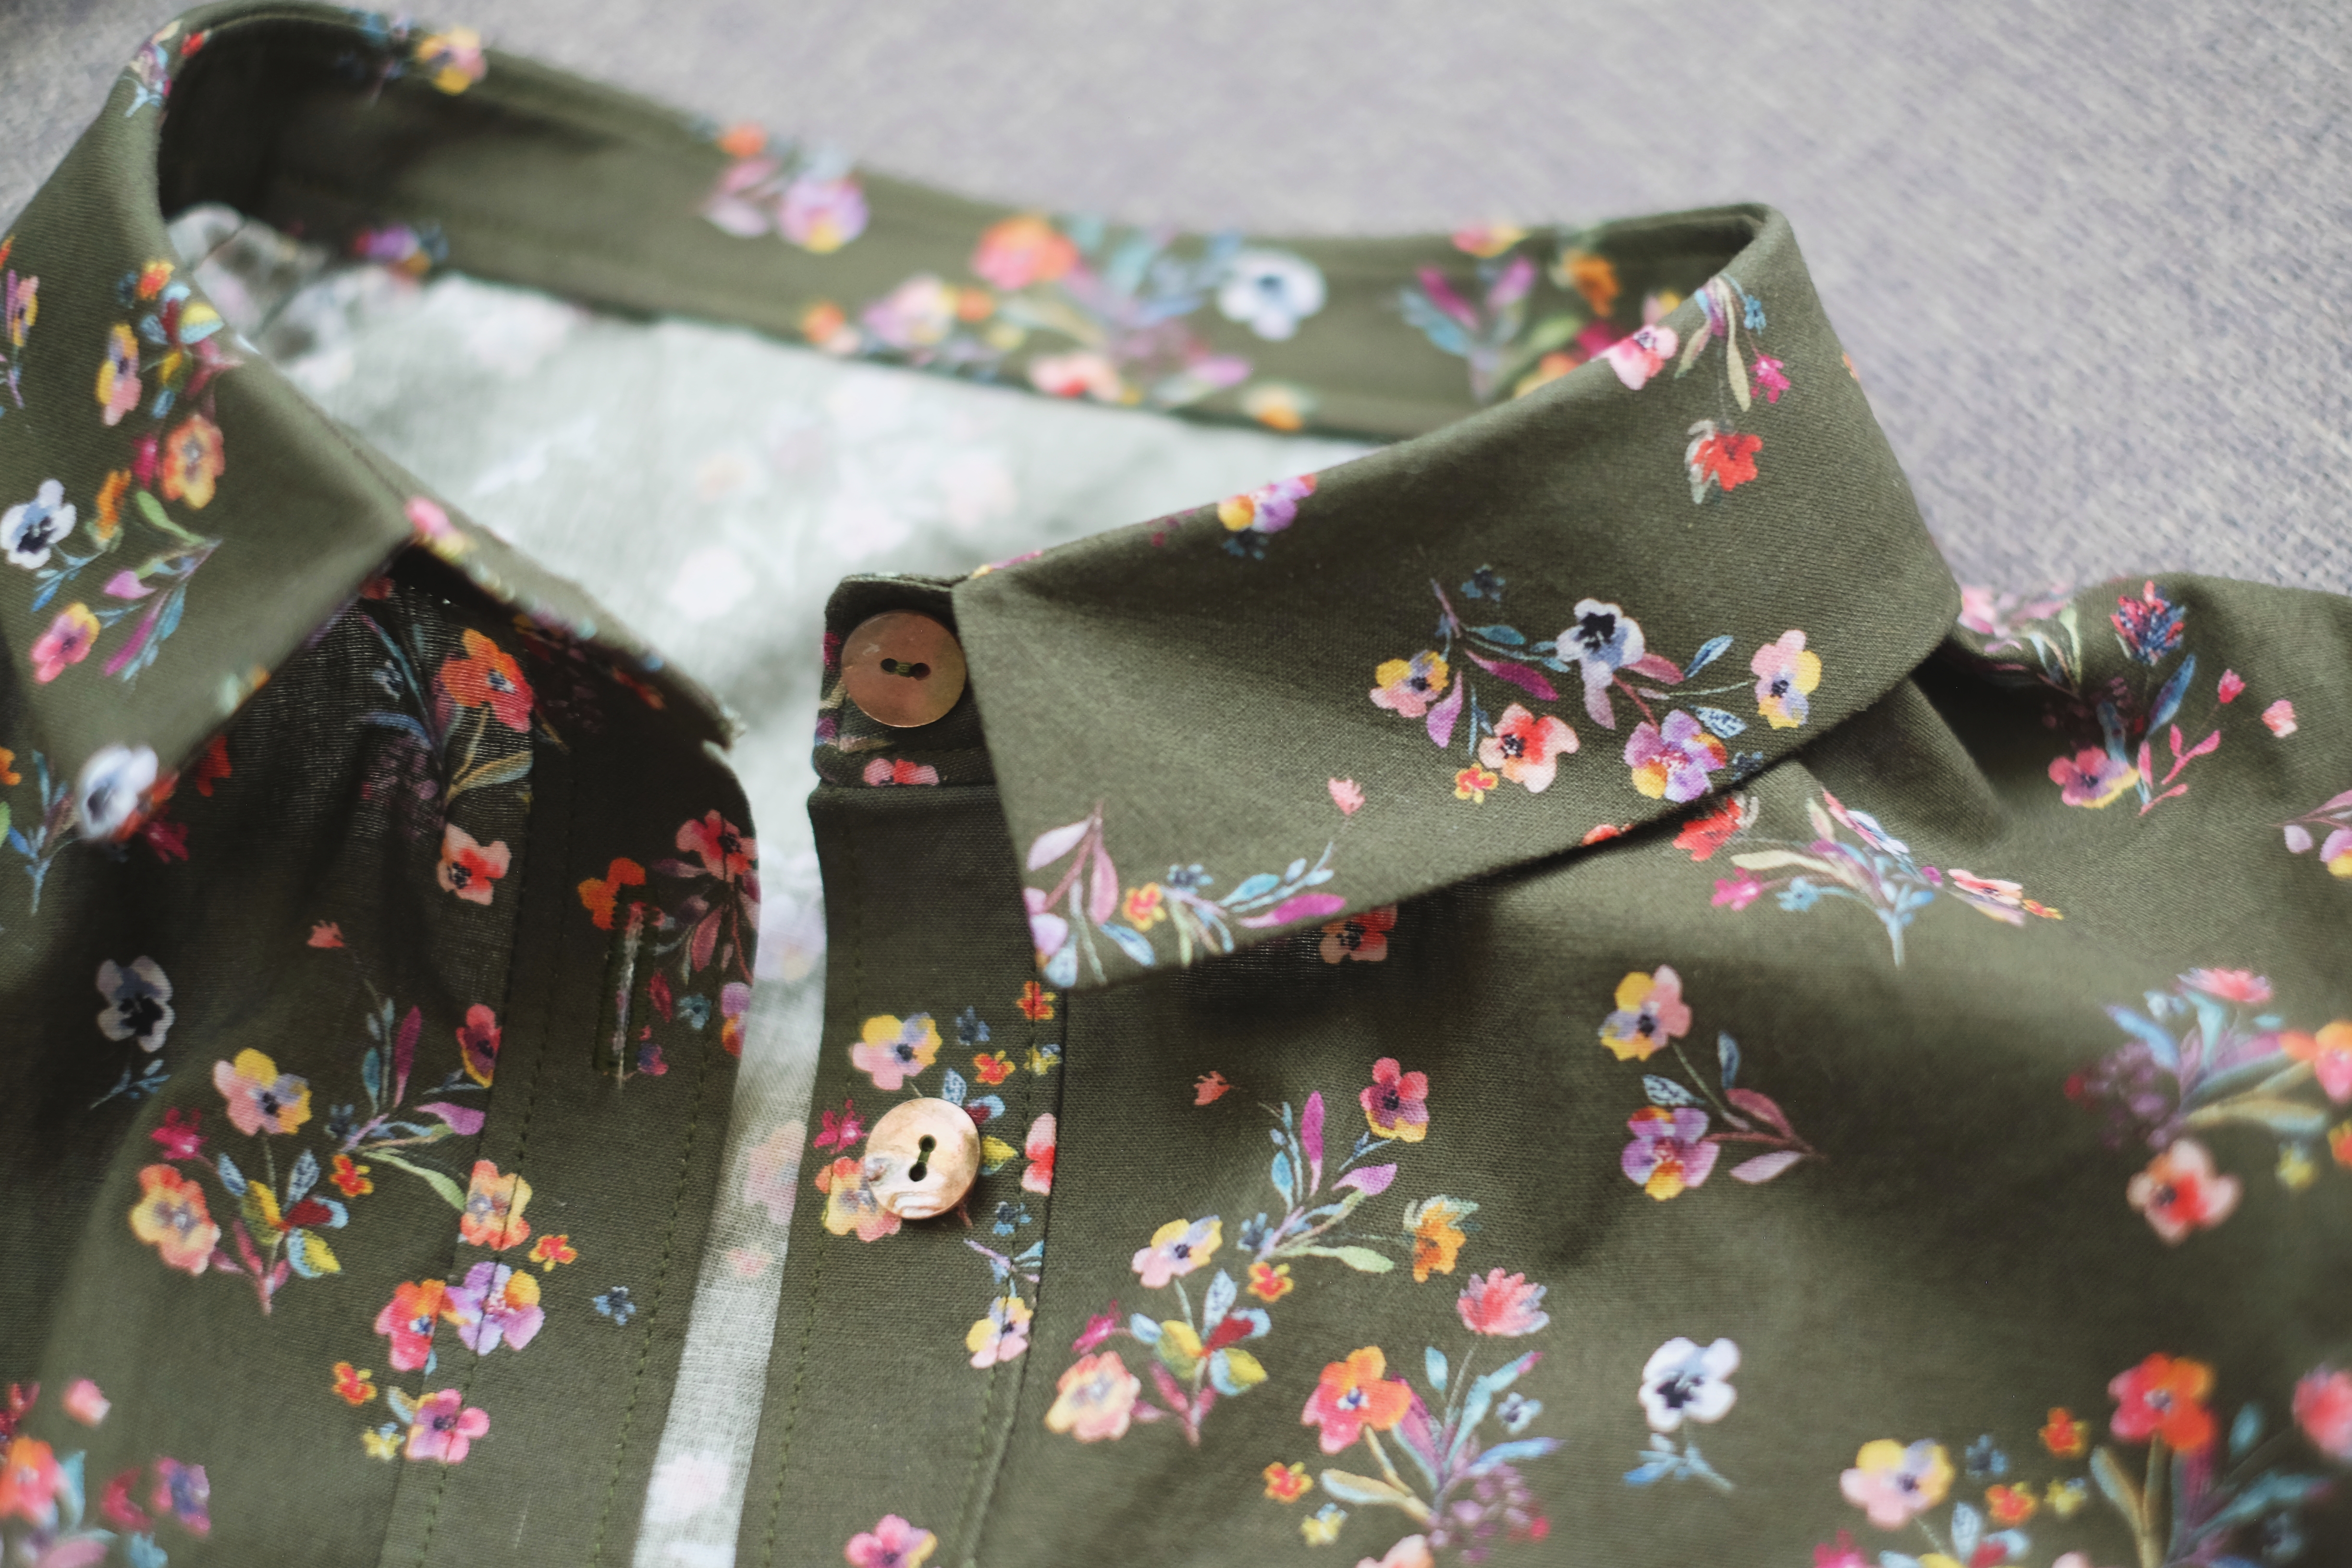
I finished it off with 13 mm shell buttons, rather that typical shirt buttons. Plastic shirt buttons proved incredibly difficult to find in Trondheim’s city center, so these made for a nice alternative. The colors go really well with the floral print, and I think I’m glad not to have plastic buttons anyway.
I’m not sure I’ll make a Willis again, but at the very least I’ll carry forward the things I learned for when I next construct a collar, and that’s worth a great deal to me. If you’ve made a Willis I’d be very curious to hear about your own experience!

Leave a comment